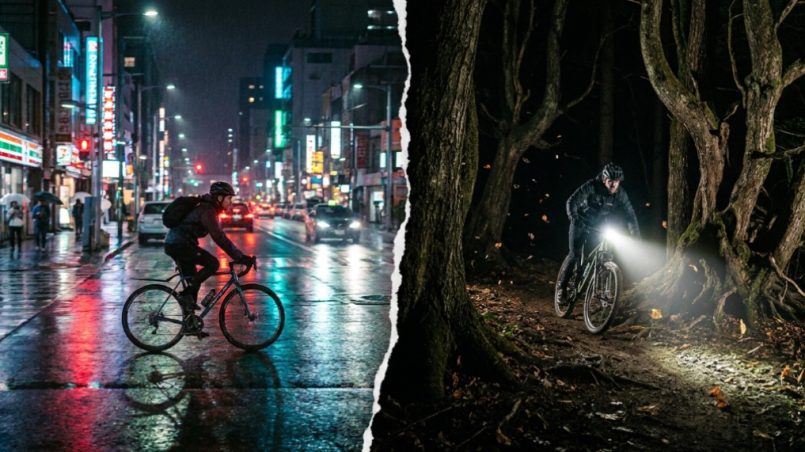
A commuter running a steady red blink through downtown traffic and a mountain biker descending a root-laced trail at night have almost nothing in common except two wheels. Yet both riders often buy the same lights, then wonder why one setup fails them. Picking the wrong configuration usually shows up as blind spots on a trail, confusing signals in traffic, or a dead battery halfway home. That’s why a purpose-built USB rechargeable bike light set should be matched to your terrain first, not picked by brightness alone. The sections below break down what changes between city commuting and dark trail riding, and how to choose accordingly
Quick Answer
Match your light setup to the riding environment, not just the lumen count. For city commuting, prioritize being seen: 400–800 lumens up front with a shaped beam and a strong daytime-visible rear light, both with extended runtimes. For dark trails, prioritize seeing: 1,500–3,000+ lumens with a wide, even beam, a helmet light for cornering, and a high-capacity battery. Run separate lights for each use rather than compromising a single setup.
Key Takeaways
- Commuting is a visibility problem; trail riding is an illumination problem. The two require different beam patterns and brightness levels.
- Lumens alone are misleading. Beam shape, mount stability, and runtime matter as much as raw output, especially on trails.
- A helmet-mounted light transforms trail riding because it aims where you look, not where the bars point.
- Cold weather, cable handling, and USB port care affect real-world reliability more than most buyers expect.
- Budget for two configurations if you do both types of riding; one compromised setup rarely serves both well.
Commuting vs. Trail Riding: Two Different Problems
City commuting and dark trail riding look similar on the surface, but the core challenge is opposite. A commuter needs to be noticed by drivers who are scanning mirrors and crosswalks. A trail rider needs to see the ground ahead well enough to read terrain at speed, in total darkness, often with no other light source for miles.
That difference drives every choice that follows: brightness, beam pattern, mounting, battery size, and how many lights you run at once.
What city commuting actually requires
Urban streets are rarely pitch black. Streetlamps, headlights, and storefronts provide ambient light, so your front light is mostly a signaling device. What it needs:
- Steady or pulsing beam at roughly 400–800 lumens, shaped to avoid blinding oncoming traffic
- Daytime-visible rear light with a flash or pulse mode
- Long runtime measured in hours, not minutes, to cover the full round trip
- Simple USB charging so you can top up at a desk or from a power bank
A common mistake is buying an off-road flood light and running it on a busy bike path. The result is glare that irritates pedestrians and drivers, poor side visibility, and a battery that drains faster than the commute lasts.
What dark trails demand instead
On a trail, ambient light disappears. Your front light has to reveal rocks, roots, ruts, and the trail edge before you reach them. That means:
- High output, typically 1,500–3,000+ lumens for fast descents
- Wide, even beam rather than a tight spotlight
- Helmet or second light aimed where you look, not where the bars point
- Stable mounts that survive rough terrain without shifting
- Bigger batteries and honest runtime specs at full power
Many trail riders pair a bar-mounted flood light with a helmet-mounted spot. The bar light handles immediate terrain; the helmet light covers corners, drops, and objects outside the bar beam.
Understanding Lumens, Beam Pattern, and Runtime
Raw lumen count is the most-quoted number in bike lighting, and it is also the easiest to misuse. Lumens describe total light output, not how that light is distributed or how long it lasts at that level.
Why beam pattern beats raw brightness on the road
A 1,000-lumen light with a tight, round hotspot is worse for commuting than a 600-lumen light with a broad, cut-off beam. The first blinds oncoming riders and drivers and leaves your lane edge dark. The second spreads usable light where you need it and keeps glare out of other people’s eyes.
Runtime at full power is the number that matters
Manufacturers often quote runtime in the lowest mode. For trails, what you need is honesty about performance at the brightness you actually ride. If a light claims 2,000 lumens for one hour but you need ninety minutes of descents, you have a problem, not a light.
Compare specs directly, using realistic criteria rather than marketing numbers:
| Factor | City commuting priority | Dark trail priority |
|---|---|---|
| Front output | 400–800 lumens | 1,500–3,000+ lumens |
| Beam shape | Shaped with cut-off | Wide flood plus helmet spot |
| Runtime | 2–4+ hours | 1.5–3+ hours at full power |
| Rear light | Daytime-visible flash | Bright steady for group visibility |
| Mounting | Quick-release for theft deterrence | Bolted or locking for rough terrain |
| Charging | USB convenience, daily top-up | USB plus spare battery or power bank |
Choosing a Front Light for the Commute
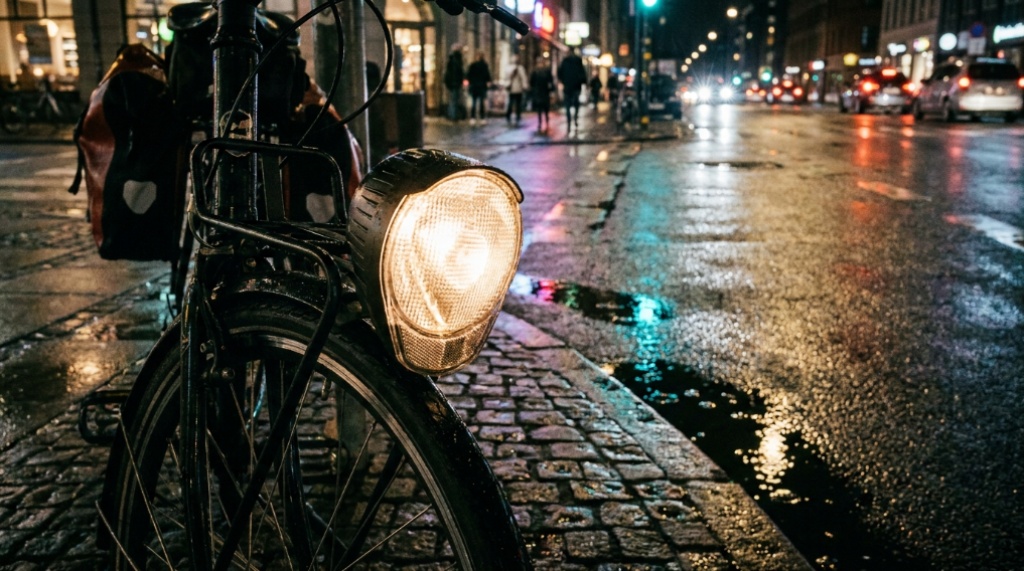
Start with a light in the 400–800 lumen range with a shaped beam that cuts off at the top to reduce glare. Look for a mount that releases quickly so you can pocket the light at your destination, and a runtime that covers your longest realistic commute plus a buffer for delays or detours.
Two practical details matter more than most buyers expect. First, side visibility: many accidents happen at intersections where a driver approaching at an angle cannot see a forward-facing light. A light with some side spill or a separate side marker helps. Second, flash modes: some cities restrict high-frequency strobes, and a constant or slow pulse is usually safer on shared paths because it does not disorient pedestrians.
Building a Trail Lighting Setup
Trail lighting works best as a system rather than a single powerful light. The typical pattern is a bar-mounted flood light for terrain directly ahead, plus a helmet-mounted light for corners, obstacles, and looking around.
Bar light versus helmet light
The bar light follows the bike, so it stays steady on straights and points where the front wheel points. On tight turns, that becomes a weakness: the bar light swings away from the corner just as you need it most. A helmet light corrects this because it points where your head turns. The two together cover both the trail ahead and the trail around the bend.
Battery strategy for longer rides
On multi-hour rides, battery management is as important as brightness. Options include carrying a spare battery, running the bar light at medium on climbs and full on descents, and using a USB power bank for a mid-ride top-up. Lights that charge via standard USB-C are easier to top up from common chargers and power banks than proprietary connectors, if you are also looking to restore your vehicle visibility, check out these easy steps to fix a foggy headlight with natural ingredients.
Practical Charging, Mounting, and Durability Notes
USB rechargeable lights are convenient, but a few habits determine whether they last a season or several years.
- Protect the USB port. Dust and water ingress are the most common cause of early failure. Keep the port cover seated when not charging.
- Charge at room temperature. Lithium batteries charge poorly and age faster in cold or extreme heat. A light brought in from a winter ride should warm up before charging.
- Match the current rating. A weak charger makes charging slow; a mismatched one can stress the battery. Use the manufacturer’s recommended charger or a standard USB source.
- Check the mount, not just the light. On trails, mounts fail more often than LEDs. Prefer metal clamps or locking mechanisms over thin plastic straps.
For durability, look for water resistance ratings rather than vague “weatherproof” claims. If a rating is not listed, assume the light is not designed for sustained rain.
Common Mistakes When Buying a Light Set
Several buying mistakes recur regardless of experience level.
- Buying for peak lumens only. Brightness without beam control or runtime is a marketing number, not a usable feature.
- Reusing a commuter light on trails. A shaped, cut-off beam leaves trail edges dark and hides obstacles.
- Ignoring the rear light. Rear visibility matters more than most riders assume, especially at dawn, dusk, and in rain.
- Skipping the daytime mode. Many riding incidents happen in daylight when a rider is not conspicuous. A flashing rear light in daytime improves awareness.
- Forgetting cold-weather runtime. Battery capacity drops in low temperatures, so plan for a shorter realistic runtime in winter.
Frequently Asked Questions
How many lumens do I actually need for commuting?
Most city commuters do well with 400–800 lumens on the front, provided the beam is shaped and does not blind oncoming traffic. A bright, daytime-visible rear light is equally important. Higher output is not automatically better in urban settings.
Can I use one light set for both commuting and trail riding?
You can, but you will be compromising. A light bright enough for trails tends to be too glaring and short-running for commuting. A light optimized for commuting is too dim and narrow for dark descents. Two purpose-specific setups deliver better results.
Is a helmet light really necessary for trails?
It is not strictly required, but it dramatically improves cornering and obstacle visibility. A helmet light points where you look, which bar lights cannot do. Many trail riders consider it the single most useful upgrade after the bar light itself.
How long should a USB rechargeable light last per charge?
For commuting, aim for runtime that covers your full round trip plus a buffer. For trails, expect 1.5–3 hours at full power from larger-capacity lights, and plan for shorter runtimes in cold weather.
Do I need a rear light during the day?
Yes. A flashing or pulsing rear light significantly improves your visibility to drivers in daylight, especially in low sun angles, rain, or heavy traffic. It is one of the simplest and most effective safety additions you can make.
What should I check before buying a bike light set?
Confirm beam shape, runtime at the brightness you will actually use, mount quality, water resistance rating, and charging standard. Ignore peak lumen marketing and focus on the numbers that match your riding conditions.
Conclusion
The right setup comes down to whether you are trying to be seen or to see. Commuters need shaped, moderate-output front lights and bright rear visibility with long runtimes. Trail riders need high-output flood lights, a helmet light for corners, and batteries that survive full-power descents. Choose based on where you ride most often, plan for the weather and ride length you actually experience, and treat the mount and charging system as seriously as the beam itself.