Starting your car painting journey can feel overwhelming. There are so many products, techniques, and steps to learn. However, the process becomes much simpler once you break it down. With the right guidance and a modest budget, you can achieve professional-looking results right in your own garage. This guide covers the automotive painting basics you need to get started safely and confidently.
Why DIY Car Painting Is Worth Trying
Professional auto body shops charge hundreds — sometimes thousands — of dollars for a paint job. That cost puts a lot of people off. However, DIY car care has become increasingly accessible, thanks to affordable tools and a wealth of online resources.
Painting your own car gives you creative control. You choose the color, the finish, and the timeline. Additionally, you build a skill that saves you money for years to come. Many beginners start with small panels or spare hoods before tackling a full vehicle. That approach builds confidence without the risk of ruining your daily driver.
Gathering Your Tools on a Budget
You do not need top-of-the-line equipment to get started. In fact, many beginners achieve great results with entry-level tools. Here is what you will need:
- A gravity-feed spray gun (HVLP style works well for beginners)
- An air compressor with at least 6 to 8 CFM output
- Sandpaper in various grits (80, 180, 400, 800, and 1500)
- Masking tape and plastic sheeting
- A tack cloth for removing dust
- Safety gear including a respirator mask, gloves, and safety glasses
- Automotive primer, base coat, and clear coat
You can find starter spray gun kits online for as little as $40 to $80. These are perfectly suitable for practice and small jobs. Therefore, you do not need to spend a fortune before you know if this hobby is right for you.
Preparing the Surface the Right Way
Surface preparation is the most important part of any paint job. Many beginners skip this step or rush through it. That is a mistake that always shows in the final result.
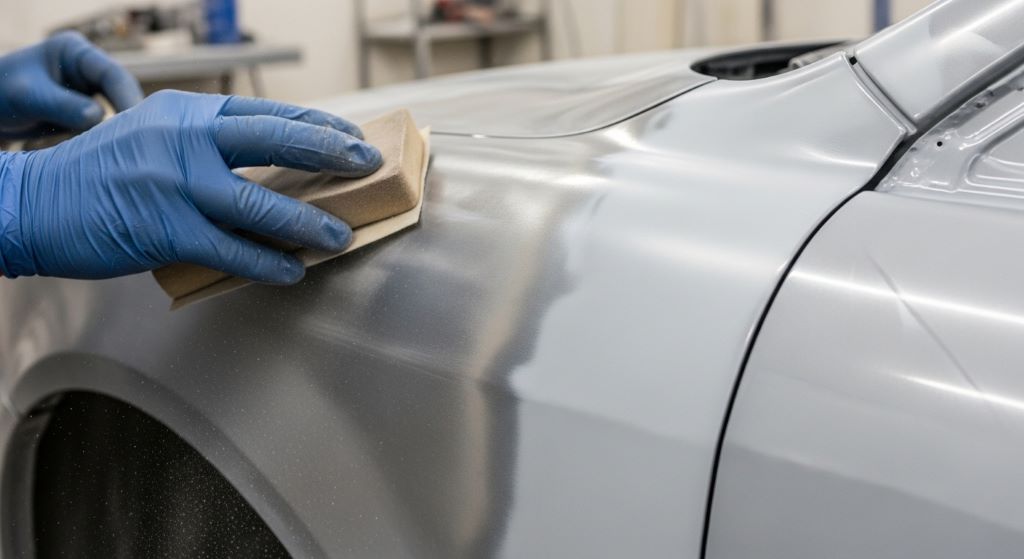
Start by washing the car panel thoroughly. Remove all dirt, grease, and wax. Next, sand the surface starting with a coarser grit like 180 and working your way up to 400. Sanding creates tiny scratches that help the primer bond to the metal. After sanding, wipe the surface with a tack cloth to pick up all dust particles.
Apply a coat of automotive primer and let it dry fully. Then sand it lightly with 400-grit paper. This step ensures a smooth base for your color coat. Additionally, tape off any areas you do not want painted, such as windows, trim, and rubber seals.
Good preparation takes time. However, it is the foundation of a quality finish. Skipping it leads to peeling, bubbling, and uneven color.
Understanding Spray Gun Techniques for Beginners
Learning proper spray gun techniques is where most beginners feel the most anxiety. The good news is that the basics are easy to learn. Practice on a cardboard box or old metal sheet before moving to your car.
Hold the spray gun about 6 to 8 inches from the surface. Move in smooth, even strokes from side to side. Overlap each pass by about 50 percent to avoid streaks. Keep the gun moving at all times. Stopping while spraying causes runs and drips.
Trigger control matters too. Pull the trigger just before you reach the panel edge and release it just after you pass the other side. This prevents heavy buildup at the edges. Additionally, maintain a consistent speed throughout each stroke.
Start with light coats. It is tempting to lay on thick paint to get coverage quickly. However, thin coats dry faster, level better, and reduce the chance of runs. Two or three light coats always look better than one heavy one.
Practice is the fastest teacher. After just a few sessions, your movements will become natural and consistent.
Applying Primer, Base Coat, and Clear Coat
Once your surface is prepped and you feel comfortable with your spray gun techniques, it is time to apply paint in layers.
Begin with primer. Apply two thin coats, allowing each to flash off (partially dry) before applying the next. Flash time is usually 10 to 15 minutes depending on temperature and humidity. After the primer is fully dry, sand it lightly with 400-grit paper and wipe it down with a tack cloth.
Next comes the base coat, which is your actual color. Apply three to four thin coats. Follow the manufacturer’s flash times between each coat. Do not sand between base coat layers. The goal is smooth, even coverage with no streaks or dry spots.
Finally, apply the clear coat. This is the layer that protects your color and gives the finish its shine. Apply two to three coats. Clear coat is sensitive to dust, so work in as clean an environment as possible.
After the clear coat cures for 24 to 48 hours, you can wet sand with 1500-grit paper and then polish the surface to a high gloss. This final step makes a huge difference in the overall look.
Staying Safe While Painting
Safety is non-negotiable. Automotive paints contain solvents and chemicals that are harmful if inhaled or absorbed through the skin. Always wear a proper respirator — not just a dust mask — when spraying. Work in a well-ventilated area to keep fumes from building up.
Wear nitrile gloves and protective eyewear throughout the process. Keep paint and solvents away from open flames. Store all chemicals in a cool, dry place away from children and pets. Additionally, dispose of rags soaked in solvent properly, as they can be a fire hazard.
Taking safety seriously also means taking your time. Rushing leads to mistakes, and some of those mistakes involve spilling or splashing harmful chemicals.
Common Beginner Mistakes to Avoid
Learning from mistakes is part of the process. However, knowing what to watch for ahead of time saves a lot of frustration. Here are the most common errors beginners make:
- Skipping surface preparation or rushing through it
- Holding the spray gun too far away or too close to the surface
- Applying paint that is too thick, leading to drips and runs
- Not allowing enough flash time between coats
- Painting in high humidity or direct sunlight, which affects drying and adhesion
- Neglecting to stir or mix paint properly before use
Additionally, using the wrong type of paint for your project is a common issue. Always check that your primer, base coat, and clear coat are all compatible with each other. Mixing brands or systems without checking compatibility can cause the paint to wrinkle or peel.
Conclusion
Starting car painting as a beginner is a rewarding and achievable goal. By learning the automotive painting basics, investing in affordable tools, and taking your time with surface preparation, you set yourself up for success. Mastering spray gun techniques takes practice, but even early attempts teach you something valuable.
DIY car care gives you independence and confidence. You no longer have to rely entirely on expensive body shops for minor paint repairs or cosmetic upgrades. Additionally, every project builds on the last, so your skills only improve over time.
Start small, stay patient, and prioritize safety. Before long, you will be turning heads with a finish you painted yourself.
Frequently Asked Questions
What is the best spray gun for a beginner on a budget?
An entry-level HVLP (High Volume Low Pressure) gravity-feed spray gun is ideal for beginners. They are affordable, easy to clean, and produce a fine, controlled spray. Brands like Devilbiss, TCP Global, and Astro are popular starting options.
Do I need a special compressor for painting cars?
Yes, you need an air compressor that delivers at least 6 to 8 CFM (cubic feet per minute) at around 40 PSI. Small pancake compressors used for nailing are not powerful enough for spray guns. A tank size of at least 20 to 30 gallons is recommended.
Can I paint a car outside, or do I need a spray booth?
You can paint outdoors, but conditions matter a lot. Choose a calm, dry day with no wind. Avoid painting in direct sunlight or high humidity. Dust and debris in the air can land on wet paint and ruin the finish. A simple tarp enclosure helps create a cleaner environment.
How long does a beginner’s DIY paint job usually take?
A full panel typically takes one to two days when you factor in preparation, priming, painting, and curing time. A complete car can take a weekend or longer. The more time you invest in preparation, the better the final result.
Is it cheaper to paint a car yourself or take it to a shop?
DIY painting is significantly cheaper for those willing to learn. A basic kit — including a spray gun, compressor, and paint — can cost between $200 and $500. A professional shop paint job starts at $500 for basic work and can exceed $5,000 for high-quality finishes.
Related Topics:
An In-Depth Guide to John Deere Battery Size Chart
Easy Steps to Fix a Foggy Headlight With Natural Ingredients